.png)
Tokenization, sub-chains, compliance, those words might sound big at first. But at the heart of ONINO, it all starts with something simple: holding ONI. Whether you’ve just discovered our ecosystem or you’re looking for your first step into RWAs and Tokenization, this guide is for you!
In this blog we’ll walk you through the basics: setting up a wallet, moving your tokens, and putting them to work by staking. No jargon walls. Simply clear steps to help you get started.
Step 1: Choose Your Wallet
The ONINO wallet is your key to the ONINO ecosystem. You’ll need one to hold ONI, stake, and interact with dApps built on our chain.
- Since ONINO is EVM-compatible, MetaMask and any other EVM-compatible wallets works seamlessly. Just make sure you can add custom networks to the wallet.
- If you prefer extra security, a hardware wallet (like Ledger) can connect to MetaMask for cold storage peace of mind.
👉 Tip: Make sure to safely back up your recovery phrase. Losing that means losing access to your tokens.
Step 2: Get Your ONI Tokens
There are two ways you might already hold ONI:
- Legacy ONI (ERC-20 or BEP-20) from Ethereum or BNB Chain.
- These need to be upgraded 1:1 to native ONI on ONINO Mainnet. You’ll do this through our Token Upgrade Portal.
- Once upgraded, your tokens unlock the full power of ONINO: staking, sub-chains, and more!
- Buying ONI directly on MEXC
- If you go this route, simply withdraw your ONI to your ONINO wallet address.
- MEXC is the only exchange supporting trading of native ONI currently.
👉 Tip: Always double-check the network when withdrawing. Native ONI runs on ONINO Mainnet, not Ethereum or BNB anymore.
Step 3: Connect to ONINO Mainnet
MetaMask doesn’t come preloaded with ONINO. You’ll need to add it manually:
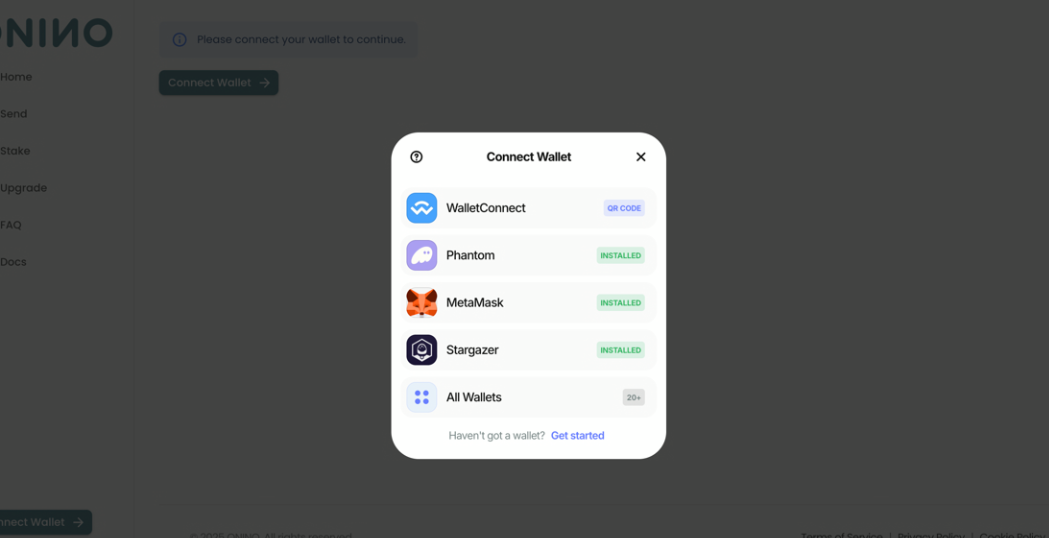
- Open ONINO Wallet and click “connect wallet”
- Open MetaMask → Create an account and add extension to chrome → Connect it to ONINO Mainnet.
- Save, switch networks, and you’re ready.
Sometimes if the network doesn't show up you’ll need to give some details to add it. Here is the link to more [ info ]
Once you see your balance showing ONI, you’ve officially joined the ecosystem.
Step 4: Start Staking
Staking is where you stop being just a holder, and start being part of the network. By staking, you:
- Help secure the chain.
- Earn ONI rewards.
- Potentially gain a future voice in governance.
Here’s how:
- Open the ONINO Staking Dashboard (linked from our docs or app portal).
- Choose a validator. Each one has its own track record and commission rate.
- Enter the amount of ONI you’d like to stake.
- Confirm the transaction in MetaMask.
For more in-depth instructions on how to stake, follow this link That’s it. Your ONI is now delegated, and you’ll see rewards accumulate over time.
👉 Tip: Pick validators with strong uptime and reasonable commissions to maximize your rewards.
Step 5: Explore What’s Next
With your ONI staked, you’ve got skin in the game. Now the real fun begins.
- Track your rewards directly from the staking dashboard.
- Unstake or re-delegate anytime if you want to adjust.
- Dive deeper into ONINO: explore sub-chains, tokenization tools, or even build on our developer platform!
Final Thoughts
Starting from a wallet and a few tokens, you’ve just connected to something much bigger: Europe’s Tokenization Engine, a chain built for real-world assets, compliant tokenization, and a future where ownership flows seamlessly across borders.
Staking is more than an earning mechanism, it’s a way to stand behind that vision.
So welcome aboard. From wallet to staking, you’re now part of the ONINO ecosystem.
Find us on
X (Twitter) │ LinkedIN │ TG (Telegram)

